Getting Started
This guide takes you from a fresh project to a working mechanic: a real-time scene with a player and an enemy, where hitting the enemy takes five points off its health.
It has three parts.
- The model — the five elements of Power, and how Stats are organized.
- Setting up the world — the Quick Initializer, which generates the World, Diplomacy, and Actor assets for you.
- Your first Effect — building the damage Effect and delivering it.
For deeper explanations of everything below, the video series covers Power's features and workflows step by step.
▶ Watch the Power Video Tutorials on YouTube
1. The model
Power flow consists of five elements: Actor, Stat, Effector, Effect, and Processor.
- Actors contain Stats.
- Effectors apply Effects through Processors to modify Stats.
 Effect
 Processors
 Stats
StatsThe overall concept is easy to understand. In practice, using Power is mostly about defining relations between Power assets.
How Stats are organized
All Actors store their Stats in a multi-layered container structure. At the top level there is the Stat Repository — it holds the full Stat Definition set and is what the Actor uses at runtime.
The hierarchy is: Repository → Environment → Container → Stat
 Stat Repository
 Environment ·
  FloatStats
- IntStats
- Vector3
- String
Environment · - Modifiers
- ConditionalModifiers
- DurationModifiers
- Limiters
- Reflectors
Environment · - CounterEffects
- StateBasedEffect
- Generators
- EffectPack
- Director
Container
Containers group Stat Definitions of the same type.
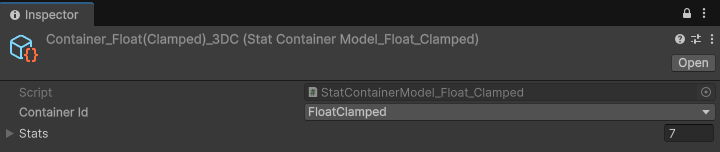
For example
- IntContainer contains Int stats
- GeneratorFloatContainer contains GeneratorFloat stats
- StateBasedEffectContainer contains StateBasedEffect stats
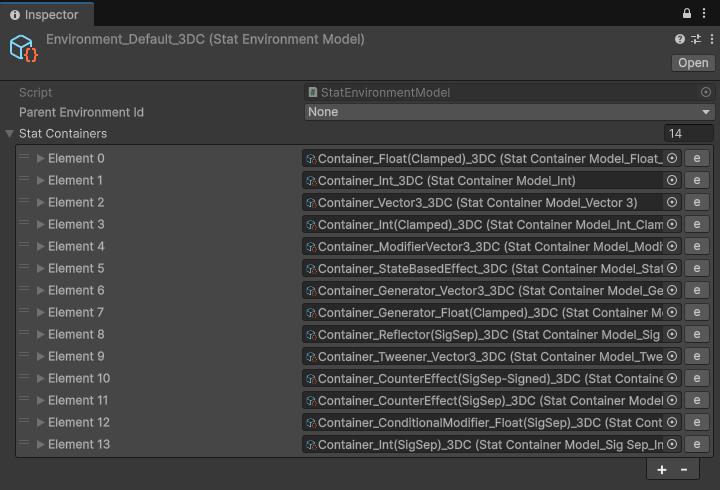
Environment
Environments group different types of Stat Containers together.
Repository
The Repository holds multiple Stat Environments.
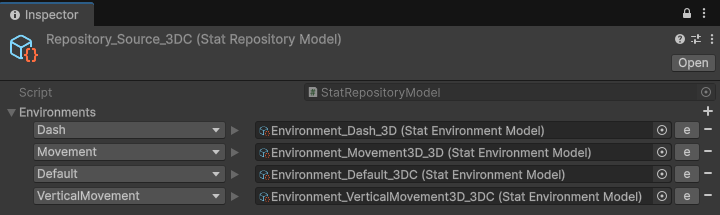
In simple systems, working only with the Default Environment may be sufficient. However, you may also need systems that require multiple environments.
For example, imagine a robot with multiple limbs, each having its own health. When we shoot the robot's arm and its health reaches zero, we can disable that specific limb. In this case, we can define separate environments for each limb such as the arm and other body parts. This allows each environment to have different health values, damage multipliers, and unique reactions to damage events.
2. Setting up the world
Before any Effect can run, Power needs a World: something to tick timers, something to decide who counts as an enemy, and a Stat Repository for your Actors to use.
You could create each of those assets by hand. The Quick Initializer generates all of them in one pass.
Import General Expansions first
Open the Power Editor from Tools → Power → Editor, then go to Initializer → Sample Importer and import General Expansions.
Do this before running the Initializer. The Initializer's Diplomacy Provider dropdown only lists provider types that already exist in the project, and the provider this guide uses — PowerDiplomacyProvider_Battle — ships with General Expansions.
General Expansions also provides the OnCollide Effector used in part 3, so one import covers both halves of this guide.
Open the Initializer
In the Power Editor, open the Initializer tab. It has two sections: Power Initializer and Quick World Initializer.
Identifier Databases are already there
Power's identifier databases — Stat Ids, Container Ids, Environment Ids, Relation States, and so on — are created automatically the first time the project loads, with their default values. There is nothing to do here, and nothing to click. See Identifiers for what they are.
The Power Initializer section's Init Identifier Databases button is a reset, not a setup step. It deletes the databases and recreates them from defaults.
Pressing Init Identifier Databases on a project you have worked in permanently deletes every custom identifier you have added. This cannot be undone. Leave it alone unless you deliberately want to start the identifiers over.
Everything below is the Quick World Initializer section.
Phase 1 — Updaters
Updaters track the timing of Modifiers, Generators, and Effectors. The Initializer lists every Updater type in the project as a checkbox.
| Updater | Pacing |
|---|---|
UpdaterModel_Realtime | Durations tick in seconds. Modifiers expire on a clock, Generators fire on an interval. |
UpdaterModel_Turnbased | Durations tick in turns. Nothing advances until the game says a turn has passed. |
This guide builds a real-time action scene, so tick UpdaterModel_Realtime and leave Turnbased unchecked.
You can tick both. A game with real-time movement and a turn-based battle screen runs the two Updaters side by side, and each Effect chooses its pacing through its own duration settings.
See Updater for the full picture.
Phase 2 — Diplomacy
Diplomacy is how Power answers "is this Actor my enemy?" — which is what lets one damage Effect hurt enemies without also hurting your own team.
Two fields:
Faction / team count — set this to 2: one team for the player, one for the enemies. The Initializer builds a relation matrix covering every pair of teams.
Diplomacy provider — choose PowerDiplomacyProvider_Battle. It defines the five relation states this guide needs:
| Relation State | Meaning |
|---|---|
Me | The Actor itself |
Team | Same team number |
Ally | A different team, declared friendly |
Neutral | A different team with no declared relation — the fallback |
Enemy | A different team, declared hostile |
These five are built into the Relation State identifier database, and the Battle provider uses them by default, so they are selectable on every asset that filters by relation.
After initializing, open the generated DiplomacyDefinition asset and set the relation between team 0 and team 1 to Enemy. The Initializer creates the matrix but leaves the relations at their default value — declaring them is your call, not something it can guess.
Each Actor's team is stored in an Int Stat called Stat_TeamNo, which the Initializer also generates. The Diplomacy controller writes it at runtime when an Actor joins a team:
PowerWorld.Diplomacy.AddMember(actor, teamId);
AddMember sets the Actor's Stat_TeamNo to the given team, registers the Actor as a member of that team, and keeps the two in sync afterwards — changing the Stat later moves the Actor to the new team on its own. So spawn your player with AddMember(player, 0) and your enemies with AddMember(enemy, 1), and Diplomacy resolves them as enemies from there.
Both samples do exactly this: see PowerDemoArena.SpawnActor in 3DCells and GameController_SlayTheSphere in Slay The Sphere.
See Diplomacy for relations, teams, and scope queries.
Phase 3 — Actor Types
An Actor Type is a kind of Actor that needs its own Stat Repository — Player, Mob, Turret, Destructible Crate.
For this guide, set the count to 1 and name it Character. Both the player and the enemy will use the same Repository, because both need the same Stats: health, a team number, and nothing else yet. They differ only in the values those Stats hold at runtime, not in which Stats exist.
Add more Actor Types when Actors genuinely need different Stats — not merely different numbers.
Press Initialize
| Asset | What it is |
|---|---|
WorldSettings | The root asset. Points at the Updaters, Diplomacy Settings, and Log Settings below. |
UpdaterModel_Realtime | The Updater you ticked, registered into WorldSettings.Updaters. |
DiplomacyDefinition | The team relation matrix — one entry per team pair, awaiting your Enemy declaration. |
DiplomacyProvider | An instance of PowerDiplomacyProvider_Battle. |
DiplomacySettings | Team count, the provider, and the Team Stat Key. |
Key_TeamNo | Stat Key pointing at Default Environment → IntStat Container → TeamNo. |
Stat_TeamNo | The Int Stat Definition that holds an Actor's team number. |
LogSettings | Logging configuration for the World. |
Repository_Character | The Stat Repository for your Actor Type. |
Environment_Character_Default | Its Default Environment. |
Container_Int_Character | An Int Container inside that Environment, already holding Stat_TeamNo. |
Repository_Character- Stat_TeamNo—
Int
That is a complete, valid World. Everything from here on is content you add to it.
Before any Actor runs, the scene needs a PowerWorld component using your WorldSettings (with Initialize On Load
on). It installs the Updaters (without them durations, delays and generators never tick), the Diplomacy, and the Log
Settings — the LogSettings come with the WorldSettings, so there is nothing to assign per script. Do this first in
every new scene, test scenes included. See PowerWorld.
3. Your first Effect
We use Effects to modify Stats. An Effect defines the data describing how a Stat should be changed. It is passed through a process flow on the target, and the resulting value is applied to the Stat as a Modifier.
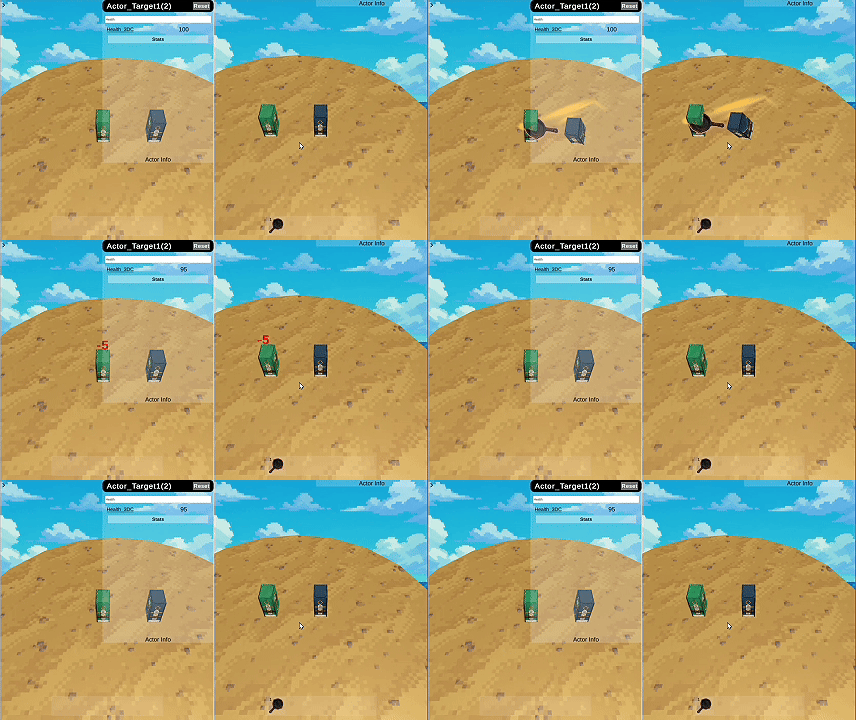
Let's decrease the enemy's health by five.

Pack_DamageFloatEffect
Health-5Processor_Add_FloatProcessorId: Add_FloatHealthStatHealth: 100 → 95The Health Stat
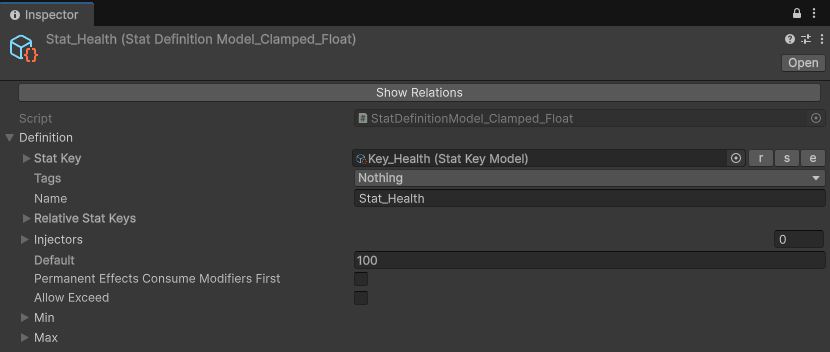
Add a Float Health Stat to Repository_Character.
Container_Int_Character holds Int Stats, so Health needs a Float Container of its own inside Environment_Character_Default. Both Actors use this one Repository, so adding Health here gives it to the player and the enemy at once.
The Effect
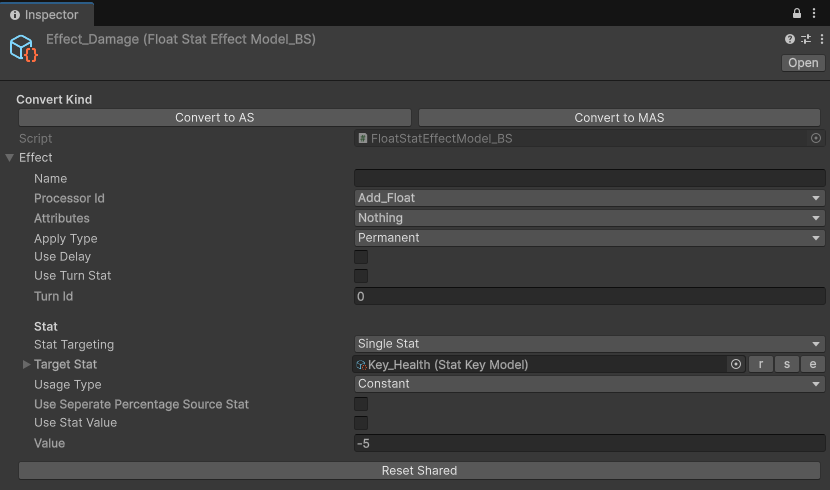
We need a FloatEffect with a value of minus five targeting the HealthStat.
The Effect Pack
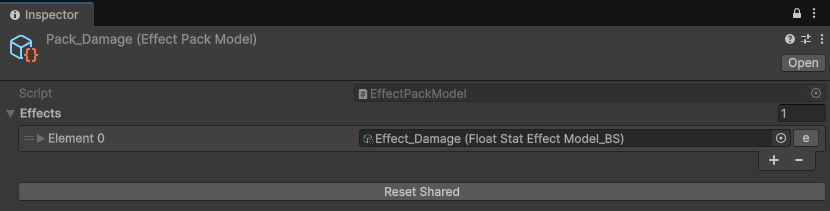
Effectors deliver their Effects in Effect Packs, so we place our Effect into Pack_Damage.
The Processor
To process the Effect, we use a Processor_Add_Float Processor assigned in the ProcessDefinition.
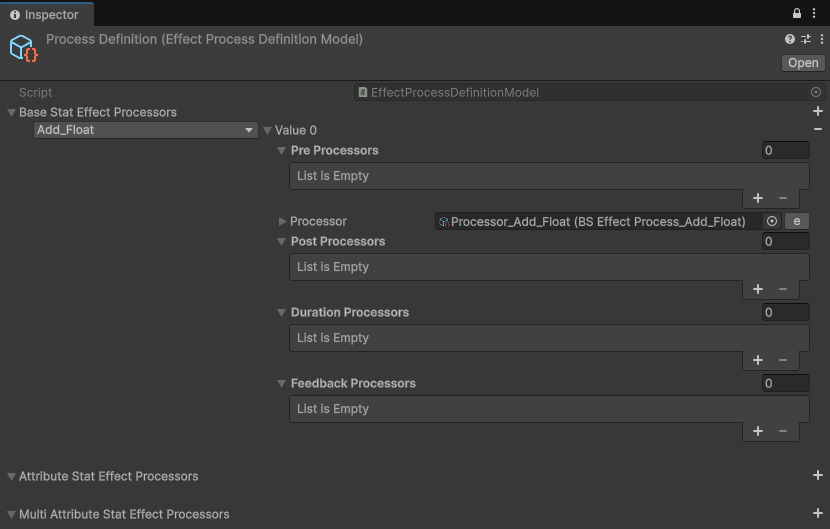
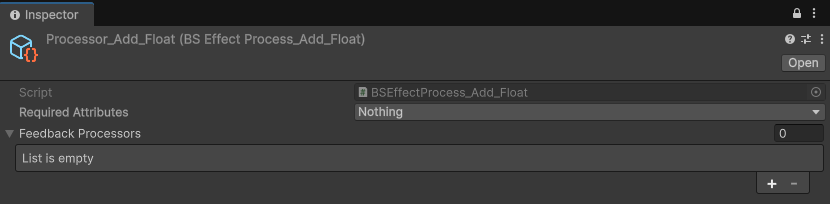
As you can see, we assign the Effect's ProcessorId as Add_Float, matching the Processor in the ProcessDefinition.
The Damage Effect is a BaseStat (BS) Effect without any Attribute Stats, so we use the plain BSEffectProcess. See Effect Flow for the difference between BaseStat and AttributeStat Effects.
The Actor
Assign the Repository_Character and the ProcessDefinition to the Actor:
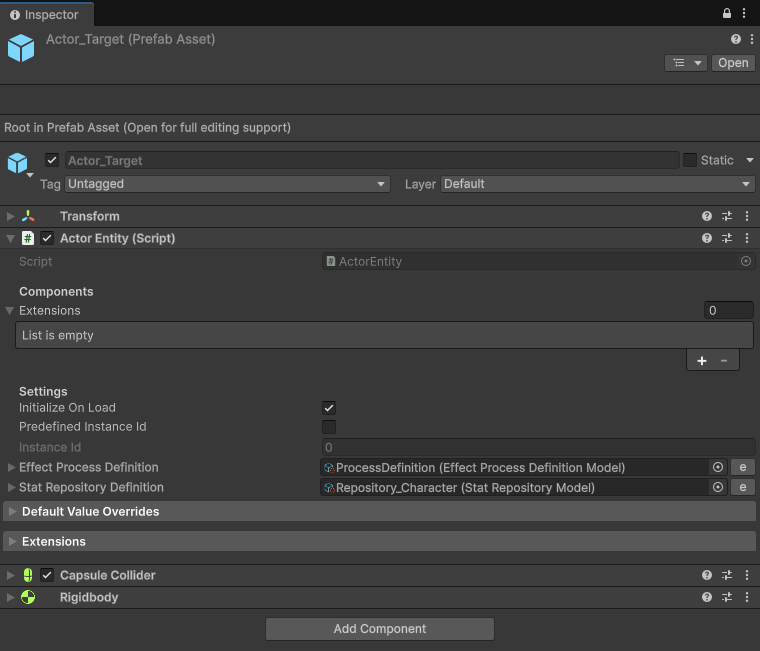
Both Actors use the same Repository and the same ProcessDefinition. What separates them is their team, and that is assigned at runtime through PowerWorld.Diplomacy.AddMember(actor, teamId) as described above — there is nothing team-related to set on the Actor asset.
Delivering it
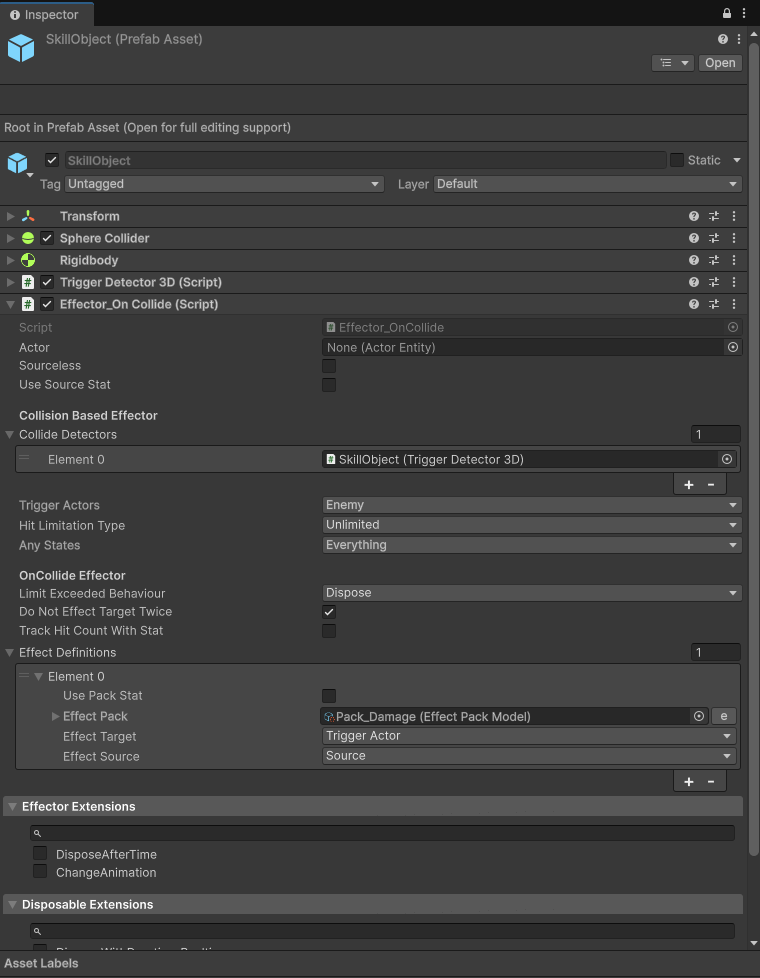
Finally, we use the OnCollide Effector from General Expansions to apply the Effect to the target. The scene and character used in this example are provided by 3DCells.
And the result:
Where to go next
- Features — everything Power can do, grouped by concept.
- Effect Process Flow — what happens between an Effect being sent and a Stat changing.
- 3DCells — a real-time action sample with 15 weapons, built on exactly the setup above.
- Slay The Sphere — the same systems, paced by
UpdaterModel_Turnbased.